
Skip to content
Bibimbap Meal Prep
Hauptgericht

Bibimbap Meal Prep

50 Min.Für 4Nutri-Score B€€
Rezept anpassen

was Sie brauchen

Zutaten

4 Personen
  • short-grain rice (rinsed)Getreide320 g
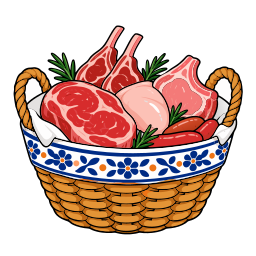
  • ground beefFleisch400 g
  • soy sauceVorräte45 ml
  • sesame oilVorräte30 ml
  • brown sugarVorräte15 g
  • garlic (minced)Obst & Gemüse3 Stücke
  • carrots (julienned)Obst & Gemüse2 Stücke

  • spinach (blanched)Obst & Gemüse200 g
  • zucchini (sliced)Obst & Gemüse1 Stück

  • shiitake mushrooms (sliced)Obst & Gemüse150 g
  • bean sproutsObst & Gemüse150 g
  • eggsMilchprodukte4 Stücke
  • gochujangVorräte45 g
  • sesame seedsNüsse & Samen10 g
  • vegetable oilVorräte30 ml
  • saltGewürze5 g

pro Portion

Nährwerte

678kcal

Kohlenhydrate
75 g
Eiweiß
33 g
Fett
28 g
Utensilien anpassen

was Sie verwenden

Utensilien

  • Stielkasserolle
  • Bratpfanne
  • Rührschüssel
  • meal prep containers ×4

Schritt für Schritt

Zubereitung

  1. Cook the rice

    • Rinse the rice until the water runs clear.
    • Cook the rice in a saucepan with water until tender, then keep warm.
    Schritt 1
  2. Marinate the beef

    • Mix the ground beef with the soy sauce, half of the sesame oil, the brown sugar and the garlic.
    • Let it marinate while you prepare the vegetables.
    Schritt 2
  3. Prepare the vegetables

    • Blanch the spinach and the bean sprouts, then squeeze dry and season with salt and a little sesame oil.
    • Sauté the carrots, zucchini and shiitake mushrooms separately in vegetable oil until just tender.
    Schritt 3
  4. Cook the beef

    • Brown the marinated beef in a hot frying pan until cooked through and slightly caramelized.
    Schritt 4
  5. Fry the eggs

    • Fry the eggs in a little oil, keeping the yolks soft.
    Schritt 5
  6. Assemble the meal prep

    • Divide the rice between the containers.
    • Arrange the beef, vegetables and a fried egg on top of each portion.
    • Add a spoonful of gochujang and sprinkle with sesame seeds.
    • Close the containers and refrigerate until serving.
    Schritt 6